 Find a Dealer
 1300 726 284
 Request a Quote
 Search

Shed slab guide: tips, base prep and common mistakes
In this article
- Shed slabs provide the structural foundation for your shed and must be designed to suit the building’s size, use and soil conditions.
- Choosing the right slab helps prevent cracking, movement and long-term structural issues.
- Factors such as shed dimensions, local site conditions and intended use influence slab requirements.
- Professional slab design ensures compliance with Australian standards and engineering requirements.
- Working with an experienced shed supplier can simplify the design, engineering and construction process.
- A well-designed shed slab protects your investment and improves the long-term performance of your shed.
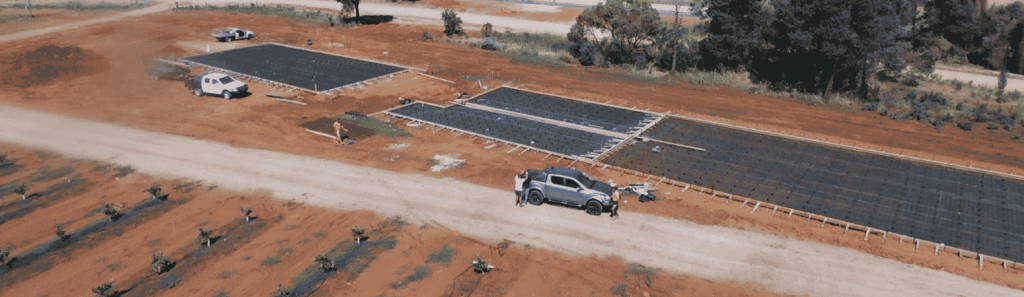
Slab design by Riverina
A strong shed starts with a solid base. Before the wall sheets, roof sheeting, roller doors, or internal fit-out are considered, the shed slab needs to be planned properly. If the concrete slab is poorly prepared, too thin, poorly drained, or not aligned with the shed plans, the finished building can be harder to install and less reliable over time.
Good shed slab design is about more than pouring concrete onto level ground. It involves:
- Site preparation
- Drainage
- Formwork
- Reinforcement
- The right concrete mix
- Curing
- The correct thickness for the building.
For a small garden shed, the slab requirements may be simple. For larger farm sheds, machinery sheds, garages, or commercial buildings, the concrete shed slab needs to support heavier loads and match the engineered shed foundation.
This guide explains what to consider before laying a slab, how to prepare a stable base, and the common mistakes to avoid before your shed is built. For more information, check our guide on DIY lab laying.
Why your shed slab matters
Your shed slab does two main jobs: it provides the foundation for the structure and creates a durable concrete floor for the space inside. If the slab moves, cracks, holds moisture, or sits too low, it can create issues with the shed frame, cladding, doors, drainage, and long-term usability.
A well-planned shed slab helps:
- Keep the shed level and structurally supported
- Create better drainage around the building
- Reduce the risk of cracking and movement
- Protect stored equipment, vehicles, and machinery
- Provide a clean, stable surface for daily use
For Ranbuild sheds, the slab should be planned around the footing plan supplied with your shed. This matters because the correct shed slab design depends on the building size, site conditions, soil, intended use, and loads the slab needs to carry.
Planning your shed slab design
A concrete slab for shed projects should not be treated as a one-size-fits-all job. The needs of a backyard garage are different from those of a rural machinery shed or a larger industrial building.
Start by reviewing the shed plans and footing requirements. These will help confirm the slab size, edge details, footings, reinforcement, and any areas that may need a thicker slab. The concreter should have these details before quoting or preparing the site.
Next, look at the ground itself: is the site flat, sloped, sandy, reactive, or prone to holding water? Soil conditions can influence excavation, drainage, compaction, and reinforcement. If the ground level varies, the site may need to be cut and filled to create a level surface.
Drainage is just as important. Ideally, the finished slab should sit slightly above the surrounding ground so water drains away from the shed. This helps protect the building from moisture and reduces the chance of water pooling around the slab edge.
How to prepare the base for a shed slab
Good site preparation gives the slab the best chance of performing well. Rushing this stage can lead to settlement, cracking, drainage problems, and a poor finish.
Start by clearing the area. Remove grass, roots, loose dirt, debris, and any soft material. The excavation should be deep enough to allow for the slab, compacted gravel, and any required footing details. A shovel may be sufficient for a small job, but larger projects often need an excavator, bobcat, or similar equipment.
Once the area is excavated, the ground needs to be levelled and compacted. A plate compactor helps create a firm, stable base. This step matters because loose soil can move under the slab after the concrete sets.
A layer of gravel or compacted gravel is commonly used under the slab to improve support and drainage. The material should be spread evenly, checked with a laser level or stringline, and compacted again. A level base helps keep the formwork accurate and the finished surface consistent.
Plastic sheeting may also be used as a moisture barrier, depending on the slab requirements. This helps manage moisture movement from the ground into the concrete. Your professional concreter can confirm what is required for your site and slab design.

How to lay a concrete slab for shed projects
If you’re looking up how to lay a concrete slab for shed projects, the process generally follows a set sequence. The details will vary depending on the engineered plans, soil, site access, slab size, and intended use.
- First, mark out the slab area. Measure carefully and check each corner. Accurate set-out helps ensure the shed frame lands where it should. Even small errors can create problems later in construction.
- Next, install the formwork. The formwork holds the wet concrete in place during the concrete pour and defines the slab edges. It should be straight, level, firmly braced, and set to the correct finished height.
- Reinforcement is then installed as specified. This may include wire mesh, rebar, or other steel reinforcement. It needs to sit in the correct position within the slab, not directly on the ground. Reinforcement helps control cracking and improves slab strength, especially where the slab needs to carry heavy loads.
- The concrete mix should match the project requirements. The right concrete mix will depend on the slab design, expected use, weather conditions, and engineering. For example, a concrete floor used for heavy machinery may need different strength and thickness requirements than a small garden shed.
- During pouring, the concrete is placed, spread, levelled, and finished. The surface may be screeded, floated, or trowelled depending on the desired finish. Work at regular intervals so the concrete stays manageable as it begins to set.
How thick should a shed slab be?
A small garden shed may not need the same concrete slab thickness as a garage, workshop, farm shed, or industrial building. A shed used for light storage has different requirements than one used for vehicles, forklifts, tractors, or heavy machinery.
So, how thick should a concrete slab for a shed be? The correct thickness should come from the engineered slab and footing plans, not guesswork. These plans consider the building size, soil, wind region, structural loads, and how the shed will be used.
You may see general advice online about how thick a concrete slab for shed projects should be, but a fixed number can be misleading. The right concrete slab thickness for one site may be unsuitable for another. In some cases, a thicker slab, additional footings, or extra reinforcement may be required.
The key takeaway is simple: the shed slab thickness should match the engineered design. If in doubt, ask your Ranbuild dealer or professional concreter before pouring.
Common shed slab mistakes to avoid
A concrete base can be difficult and expensive to fix once it is poured. Avoiding common mistakes at the start can save time, money, and frustration later.
Not following the footing plan
The footing plan is there for a reason. It sets out the slab requirements for your specific shed. If the concreter works from assumptions instead of the supplied plan, the slab may not align with the shed frame or structural requirements.
Poor site preparation
A slab needs a stable base. If the site is not properly cleared, excavated, levelled, and compacted, the slab can settle or crack. Soft soil, loose dirt, roots, or uneven ground can all create weak points.
Ignoring drainage
Water should move away from the shed, not towards it. A slab that sits too low or lacks proper fall around the site can lead to moisture issues. Good drainage protects both the slab and the shed.
Choosing the wrong slab thickness
A slab that is too thin may not be suitable for the loads it needs to carry. This is especially important for sheds that will house vehicles, machinery, pallet racking, or workshop equipment. The correct thickness should always be confirmed before pouring.
Using the wrong concrete mix
Concrete is not all the same. The right concrete mix depends on strength requirements, use, weather conditions, and the slab design. A professional concreter can help select a mix that suits the project.
Poor reinforcement placement
Wire mesh or rebar needs to sit in the correct position within the slab. If reinforcement is placed too low, too high, or unevenly, it may not perform as intended. This can increase the risk of cracking.
Rushing the curing process
Concrete does not reach full strength as soon as it looks hard. The curing process helps retain moisture while the concrete sets and gains strength. Keeping the slab moist during curing can improve long-term performance and reduce cracking.
Building too soon
The shed should not be built until the slab has cured enough for construction. Rushing this stage can affect the slab surface, fixings, and overall finish. Your builder or concreter can advise when the slab is ready.
DIY or professional concreter?
Some small shed slabs may suit capable DIYers with the right tools, planning, and experience, but for most larger Ranbuild projects, a professional concreter is the safer option.
A professional will understand excavation, formwork, reinforcement, concrete mix, slab thickness, drainage, curing, and finish quality. They will also be able to work from the supplied footing plan and coordinate the slab with the shed design. This is especially important for commercial, industrial, agricultural, and machinery sheds; these buildings often require stronger foundations because they may carry heavy loads, span longer distances, or operate under more demanding conditions.
If you’re unsure, speak with your local Ranbuild dealer before the slab is poured. Getting advice early is much easier than correcting slab issues later.
Build your shed on the right foundation
A shed is only as strong as the foundation it sits on. A well-designed shed slab provides your building with the support it needs from day one. It also helps prevent cracking, improve drainage, manage moisture, and create a practical concrete floor for years of use.
Before pouring a concrete slab for shed construction, review the supplied footing plan, properly prepare the ground, confirm the correct slab thickness, and work with an experienced concreter where needed.
Ranbuild sheds are custom-engineered to your needs and built for Australian conditions. With support from a national dealer network and the backing of BlueScope Steel, you can plan your shed and slab with confidence from the start. Speak to your local Ranbuild dealer to discuss your site, shed design, slab requirements, and next steps.
